Your Shopify sitemap is one of the most effective ways to help your site begin ranking in Google search results. Best of all, Shopify makes it easy to set up. Keep reading to find out what a sitemap is, where to find it in Shopify, and how to submit it to Google for crawling.
What Is a Sitemap?
A sitemap is basically the road map of your site, which Google can use to discover and crawl your essential pages — home page, product pages, category pages, blog posts, image URLs, etc. Google can’t show these pages in search results unless it has crawled and indexed them and a sitemap speeds up this process. Google will eventually find all of your site’s pages without a sitemap but that can take time and Google doesn’t run on your schedule.
By creating an XML sitemap (XML is a file format) and submitting it to Google, you can rest assured that Google will always be able to find all of the important pages on your Shopify site, especially as you continue to add new products and categories.
What Pages Are Included in a Sitemap?
A sitemap is simply a list of all the pages on your website that a customer could navigate to from your homepage. With a Shopify site, there are definitely pages that you don’t want Google to show in search results, like the checkout page and order summary page. Fortunately, Shopify already blocks these pages from being indexed by Google. The reason for this is that showing these pages in Google will likely provide a bad experience for customers visiting your site.
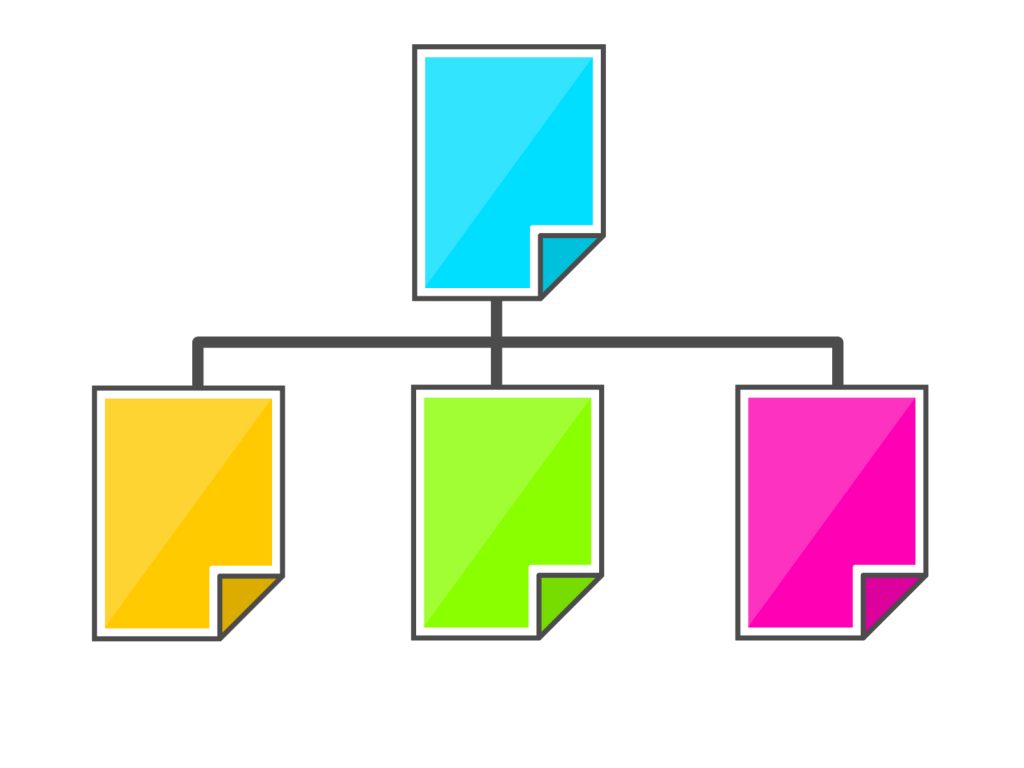
Shopify actually creates multiple secondary sitemaps that are combined to feed into the primary Shopify sitemap that Google reads. These secondary sitemaps are segmented into products, collections, blogs, and other pages. Each time you create a new page, the corresponding secondary sitemap is updated, which in turn feeds into the primary sitemap. Once Google crawls your primary sitemap again, it will discover the new pages you created.
Blocking Shopify Pages from Showing up on Google
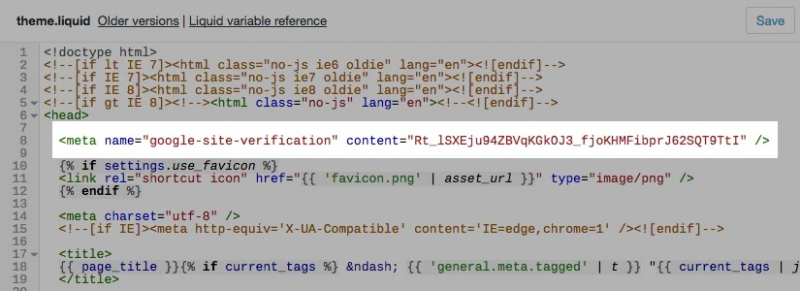
But what if Google is showing a page in search results that you want to have blocked? Generally, there are several ways that a web developer can do this, but Shopify restricts what is possible. It requires manually editing the theme.liquid file by adding some new code. It’s a pretty straightforward process that Shopify explains in detail.
Finding Your Shopify Sitemap
One of many benefits that Shopify provides with its monthly subscription fee is that it automatically creates a sitemap.xml file. To access your sitemap, add the URL path “/sitemap.xml” to the end of your root domain. Below you can see an example of how to access the sitemap for the domain “example.com”.
https://example.com/sitemap.xml
How to Submit Your Shopify Sitemap to Google?
Google accepts sitemap submissions through it’s free Search Console service. You will need to create a Gmail account to use Search Console, but you will also get access to Google’s full suite of tools including:
- Google Analytics
- Google Tag Manager
- Google My Business
- Google Ads
- Google Optimize
1. Connect Your Shopify Site to Search Console
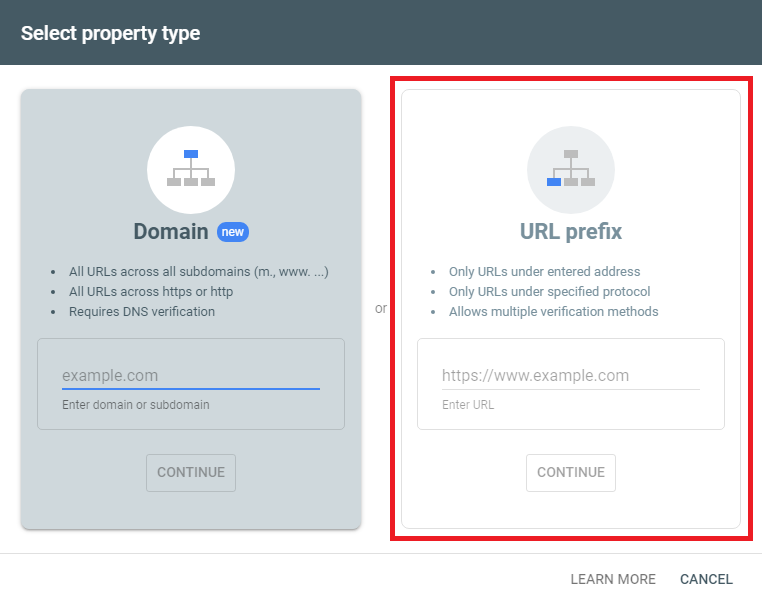
When you enter Search Console’s dashboard, the first step you want to take is to connect your Shopify site. Click on “Add Property” in the upper left-hand corner and then walk yourself through the steps of adding your domain name.
Search Console offers the option of setting up an entire domain, which requires DNS verification. However, Shopify suggests using meta tag verification, which is only possible if you choose the “URL prefix” option in Search Console.
2. Verify Your Shopify Site
Once you add your site domain, Search Console will initiate the verification process to confirm that you’re the owner. Shopify provides detailed instructions on how to verify your Shopify site using a meta tag.
3. Submit Your Sitemap
Once the verification is completed, all you need to do is click on “Sitemaps” in Search Console’s left-column menu and then in the available text field, type in “sitemap.xml” and click submit.
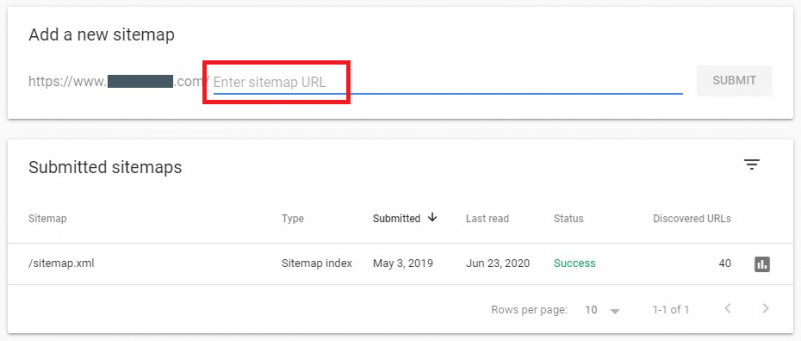
It may take a few days for Google to crawl your sitemap, which is the reason why your Shopify site may not appear in search results immediately. Be sure to check the verification status after a few days to see whether or not your submission is marked as “success”.
Shopify Sitemap Apps
As mentioned above, Shopify automatically creates a sitemap.xml file for your site. So why are there so many Shopify sitemap apps available?
While the XML sitemap file format is created specifically for search engines, there is another type called an HTML sitemap, which is designed for website visitors. It’s usually linked to from the footer menu and includes a sorted list of links to all of your important pages. This is what a Shopify sitemap app creates.
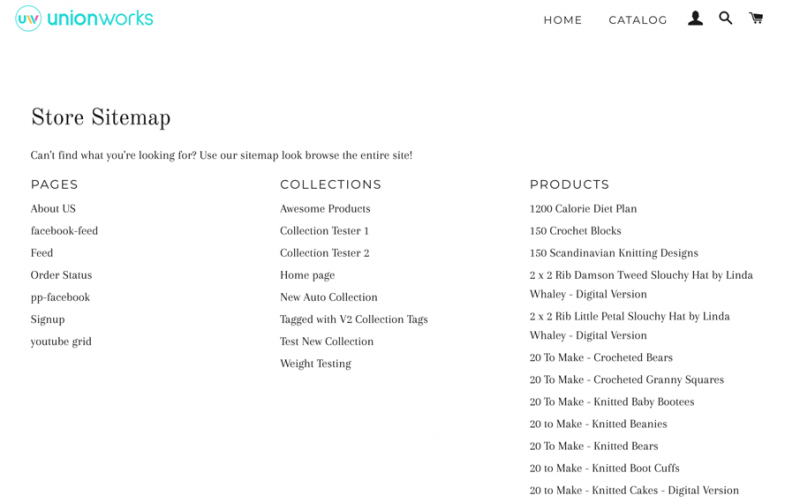
Source: SEO HTML Sitemap
In the past, the SEO best practice was to always include an HTML sitemap on your site, not only to give Google another way to quickly crawl your pages, but to also give visitors a bird’s-eye view of what is available. It was even promoted by Google’s former guru Matt Cutts as an important page to have back in 2009. Fast-forward to 2019, and Google’s new guru John Mueller now says that an HTML sitemap shouldn’t be an important part of your SEO strategy.
Based on these new insights, we suggest skipping the HTML sitemap as the added monthly cost of paying for a Shopify app may not provide the SEO benefits that you expect.
Your Shopify Sitemap Is Just One of Many Ways to Improve SEO
Submitting your Shopify sitemap to Google is an essential part of a healthy SEO strategy, but there is much more that you can do. We’ve created a list of actionable SEO tactics for Shopify that any beginner can do to get their pages ranking on Google and in front of customers’ faces.